
Gear
The Best Travel Camera Bags for Hikers and Explorers in 2026
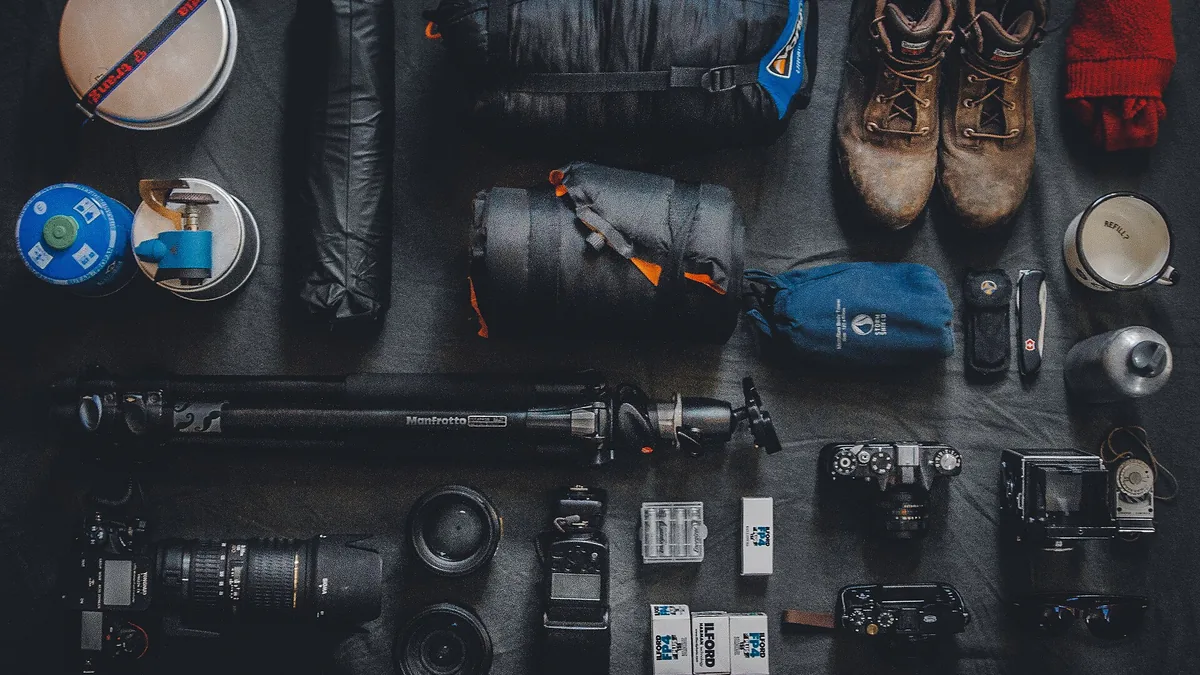
Key takeaways
- Access speed determines how many photos you take; a buried camera is an unused camera.
- A sling beats a backpack for one body and two lenses on most day hikes.
- Weather protection matters less than having a plan when it starts raining.
- Weight on your chest carries better than weight swinging on your hip.
Carrying a camera while hiking is a compromise between two things that actively fight each other: you want the camera protected and out of the way while you walk, and instantly accessible the moment something worth photographing appears. Most camera bags are designed for photographers who walk short distances between locations. Most hiking packs are designed for people who do not need to reach anything quickly. The bags built for the overlap are a small, specific category, and choosing between them comes down to three questions rather than to brand or price.
The three questions that decide everything
First: how much camera are you actually carrying? One body with a single lens attached has completely different requirements from a body, three lenses, a tripod and a filter set. Most people overestimate what they will carry on a given day and end up with a bag built for a kit that stays at home.
Second: how fast do you need to get the camera out? If you photograph landscape on a schedule — stop, compose, shoot — speed matters far less. If you photograph wildlife, people or anything that moves, a bag that takes fifteen seconds to open means you get the shot fifteen seconds too late. Access speed is the specification that most directly determines how many photographs you take.
Third: what else is in your pack, and can the camera share space with it? If you are carrying a full hiking load, a dedicated camera pack competes with your other gear for volume and weight. If you are on a day hike with a light load, a dedicated bag is easy to justify. This question determines whether you should be looking at a standalone bag at all.
Sling bags: fastest access for a small kit
A sling bag is a single-strap bag worn across your back that rotates around to your chest for access. You swing it forward, unzip, take the camera out, and swing it back, all without removing your pack or putting anything on the ground.
For a body with one lens attached plus one spare, this is the best format for hiking. Access is genuinely fast — a few seconds — the bag is small enough not to interfere with a backpack's hip belt, and the cross-body strap keeps it stable on rough ground in a way a shoulder bag does not. Some models add a secondary strap that clips around your waist for scrambling, which converts an annoyance into something you can forget about.
The limitations are capacity and long-day comfort. A sling loads one shoulder, which becomes noticeable over a full day, and rotating a heavy bag repeatedly under a hiking pack's shoulder straps is awkward. Capacity beyond a body and two lenses makes the bag bulky enough to start swinging. If your kit is bigger than that, look elsewhere.
What to look for: a strap that is wide enough not to cut in, a grab handle on top so you can lift the bag rather than dragging it by the strap, and a zip that runs along the top rather than against your body. A bag that opens away from you lets you see the contents instead of reaching blindly.
Camera backpacks: for a large kit and a full day
A dedicated camera backpack carries the load on both shoulders, which matters once you are carrying more than a couple of lenses. It also usually offers better weight distribution and a proper hip belt, which means a heavy kit is genuinely more comfortable over distance than in any sling.
The key feature to check is side or rear access. Traditional camera backpacks open from the back panel, which is excellent for security in cities and useless on a trail, because opening it means laying the bag down on wet ground. A side-access panel lets you swing the bag around on one strap and reach the camera while it stays on your body. This single feature separates hiking-capable camera backpacks from studio ones.
Look also for dividers that can be removed entirely, so the same bag works as a normal daypack when you are not carrying much camera. A tripod or water bottle pocket on the outside keeps wet and muddy items away from the interior. And check the harness: a camera backpack that fits badly in the shoulder straps will be unwearable on a long climb regardless of how good the camera compartment is.
The real cost of this format is that you are carrying two packs' worth of structure. If you already have a hiking pack you like, the cube option below is usually better value.
Camera cubes and inserts: the modular answer
A padded insert that drops into the hiking pack you already own is the most underrated option. You get a protected, organised camera compartment inside a pack that already fits you, with no second harness, no extra straps and no compromise on your hiking loadout.
This is the right answer for multi-day trips, where you need to carry camping gear as well as camera gear and a separate camera bag simply does not make sense. Place the cube high in the pack and close to your back, where weight carries best and where it is cushioned by softer items around it. Many hikers put the cube at the very top so it can be pulled out at a rest stop in one motion.
The trade-off is access. Reaching a cube inside a fully loaded pack means stopping and unpacking. If you are photographing on the move, that is a real limitation. If you photograph during breaks, it barely matters. Be honest about which kind of photographer you are on a given trip.
A useful hybrid is a small cube that stays in the top of your pack plus a chest harness or strap clip that carries the camera itself on your body. You walk with the camera ready and the spare lenses protected in the pack, which solves access and protection separately instead of trying to solve both with one bag.
Chest and strap clips: access without a bag
A clip that mounts to your backpack's shoulder strap or chest strap holds the camera on your body, ready to raise and shoot in about a second. There is no bag to open, nothing to swing around, and the weight sits on your chest where it is carried well.
For a single body with a modest lens, this is by far the fastest access system available, and it is the setup many professional outdoor photographers actually use. A camera that is out and ready gets used several times more often than one that is in a bag.
The limitations are exposure and comfort. The camera is unprotected from rain, dust, branches and rock, and a heavy lens hanging on a strap clip becomes uncomfortable over hours and can pull the shoulder strap out of position. Most clips have a weight limit beyond which they bounce annoyingly.
The practical compromise is a clip for the camera plus a light rain cover or a large dry bag that can be thrown over it in a downpour. Photographing in wet conditions is mostly about having a plan for the moment it starts raining, not about owning a waterproof bag.
Weather: the plan matters more than the bag
Almost no camera bag is genuinely waterproof; most are water-resistant and ship with a rain cover. That distinction matters. A rain cover that lives in a pocket at the bottom of the bag is a cover you will not deploy in time, because the moment you need it is the moment you do not want to be unpacking.
Keep the cover in the most accessible pocket there is, or better, put the whole bag inside a dry bag or a heavy-duty rubbish bag when the weather turns. A plastic bag torn open at the bottom makes an effective emergency cover and weighs nothing.
Inside the bag, silica gel packets help with condensation, which is the more insidious problem. Moving a cold camera into a warm humid environment, or sealing a damp camera in a bag, causes moisture to condense inside the lens and on the sensor. Let equipment dry thoroughly before packing it away, and avoid the habit of keeping a camera sealed in a bag overnight.
For genuinely wet environments, consider how the bag handles being put down. A bag with a flat, non-absorbent base can be set on wet ground without soaking through, and that is worth more on a week of rain than any fabric rating.
Weight and how it carries
Every gram on your chest or shoulders is felt more than the same gram in your pack. A camera bag that weighs a kilogram empty is a kilogram you carry all day and never photograph.
Strike a balance: enough padding to protect the gear from knocks, not enough to make the bag a piece of luggage. Removable dividers let you shed padding you do not need for a given trip, which is a genuine weight saving rather than a marketing one.
Check how the bag interacts with your hiking pack. A sling worn under a loaded backpack's hip belt usually works; worn over it, it will chafe. A backpack-style camera bag cannot be worn with a hiking pack at all, which is obvious in theory and forgotten in practice when you are packing for a trip.
If you hike with trekking poles, check that the bag does not sit where your hands swing. This sounds minor and it becomes irritating within the first kilometre.
A short checklist before you buy
Access: can you get the camera out while wearing the bag, without putting it down? Padding: is the base structured enough to stand up on its own when set down? Dividers: are they removable and reconfigurable, or fixed? Rain cover: is it included, and is it stored somewhere you will actually reach? Strap: is it wide, adjustable, and comfortable under a loaded pack? Zips: do they run smoothly with cold fingers, and do they have pulls you can grab with gloves on?
Then load the bag with your actual kit and wear it for an hour around the house or on a walk. A bag that feels fine empty and awkward loaded is the most common bad purchase in this category, and it is entirely avoidable.
Conclusion
Match the bag to the kit and to the way you shoot, not to the largest kit you might theoretically carry one day. A sling suits a small kit and fast access; a side-access camera backpack suits a large kit and a full day; an insert inside your existing hiking pack is the best answer for multi-day trips; and a strap clip is the fastest access of all for a single camera. Whatever you choose, sort out your rain plan before you leave, keep weight off your shoulders where you can, and remember that the best camera bag is the one that means you actually take the photograph.
Keep reading
The Best Tents for Wild Camping in 2026: 8 Shelters Tested in Real Weather
Compare the best wild camping tents of 2026 on weight, weather resistance and pack size. Real picks for solo trekkers, pairs and shoulder-season trips.
How to Build a Survival Shelter in the Wild: 6 Designs That Actually Keep You Dry
Six wilderness shelter designs — lean-to, debris hut, tarp configurations and snow shelters — with the situation each one is actually built for.
The Best Headlamps for Night Hiking and Camping in 2026
Lumens, beam pattern, battery life and red-light modes explained. Picks for the best hiking headlamps at every budget, with what actually matters.
