
Travel Tips
Travel Photography Tips for Beginners: Capture Better Trip Photos
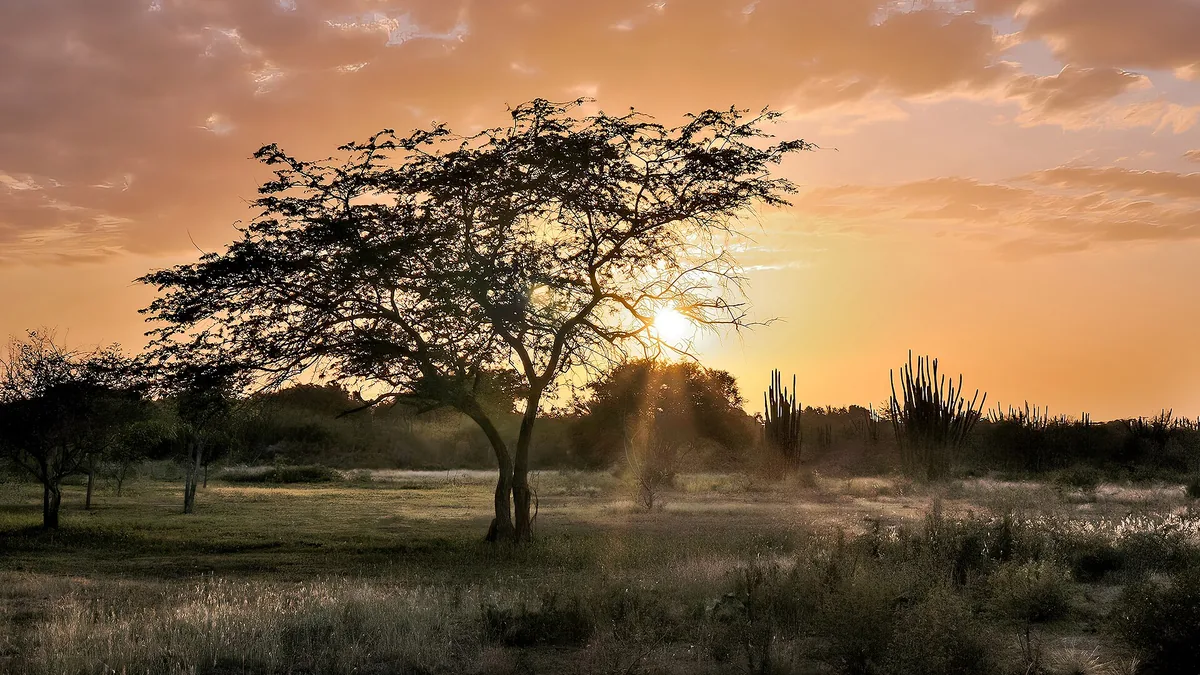
Key takeaways
- Shoot during golden hour for softer light and warmer colors.
- Use the rule of thirds and include a foreground subject for depth.
- Take fewer, more intentional photos rather than hundreds of similar shots.
- Back up daily and edit lightly to keep photos looking natural.
You do not need an expensive camera to take better travel photographs. The difference between a forgettable snapshot and an image you keep on a wall almost always comes down to light, composition, and patience — three things that cost nothing. These tips are aimed at beginners shooting on a phone or an entry-level camera, and every one of them can be practised before your next trip.
Shoot in good light
Light is the single largest variable in travel photography, and the two hours around sunrise and sunset — the golden hours — give you warm colour, soft shadows, and low contrast that flatters almost any subject. Midday sun does the opposite: it flattens colours, creates black eye sockets in portraits, and blows out skies and pale stone.
The practical consequence is a scheduling decision. If a landmark matters to you, plan to be there at one end of the day rather than the middle. Many of the world's most photographed sites are also the emptiest at 6 a.m., which is a second, unadvertised benefit of the same habit.
Use the rule of thirds
Photographs tend to feel calm and deliberate when the subject sits away from the exact centre of the frame. Divide the frame into a three-by-three grid and place your subject along one of those lines, or at a point where two lines cross. Most phones and cameras can display that grid as an overlay; turning it on is the fastest free improvement available to a beginner.
The rule is a starting point, not a law. Centred compositions work when symmetry is the point — a reflection, an archway, a corridor — but they should be a choice rather than a default.
Add a foreground
Flat landscapes often disappoint because everything in the frame sits at the same apparent distance. Giving the shot a foreground — a rock, a path, a line of flowers, a rope, a person — creates layers and tells the eye how far away the mountains really are. Without that anchor, scale collapses and a vast valley can look like a painted backdrop.
When you find a view, move. Walk three steps left, crouch, or hold the camera just above the ground and include something close. The view is the same; the photograph is not.
Include people for scale and emotion
A single small figure in a large landscape communicates size in a way that no caption can. People also carry emotion: a walker on a ridge, a fisherman on a pier, a child running down a lane gives a viewer somewhere to enter the frame. Where it is appropriate and respectful, ask before photographing strangers close up, and accept a refusal without argument.
Hold it still, and shoot deliberately
Most blurry travel photos are not the camera's fault. Tuck your elbows in, exhale, and press the shutter gently rather than stabbing at it. In low light, brace the camera against a wall, a railing, or your knee, or rest it on your bag. A tiny tripod that fits in a jacket pocket is more useful on a trip than a second lens.
Deliberate shooting also means shooting less. Ten considered frames usually beat two hundred fired off in a hurry, both because you will choose better and because you will not spend the following evening deleting duplicates. Before each press of the shutter, decide what the subject of the photograph is.
Edit lightly
Basic editing is part of the craft, not a trick, but restraint matters. Straighten the horizon, correct exposure, lift shadows slightly, add a little contrast, and stop. Heavy filters, extreme saturation, and aggressive HDR produce images that look dated within a year and artificial immediately. The goal is to reproduce what you saw, not to manufacture something you did not.
Learn one editing app thoroughly rather than five badly. Nearly every phone has a capable editor built in, and its straighten, exposure, and crop tools will handle most travel photographs.
Back up every day
Losing a memory card full of photographs is worse than losing the card. Copy your images to cloud storage or a second device at the end of each day, while you are eating dinner or charging your phone, and keep the card in your bag rather than leaving it in the camera when you go out at night.
If you are travelling for weeks, a small portable drive is cheaper than the data plan needed to upload hundreds of full-resolution files. Keep the drive in a different bag from the camera.
Practise before you leave
The worst place to learn a new camera is a once-in-a-lifetime destination. Spend a weekend at home shooting the same street at three different hours, experimenting with the grid, and editing ten photographs properly. By the time you land, the camera should be a habit rather than a puzzle.
Conclusion
Better travel photography is mostly a set of small decisions: when to arrive, where to stand, what to include in the foreground, when to press the shutter, and when to stop editing. None of them require an expensive body or a heavy bag. Master light and composition with the camera you already own, and any upgrade you buy later will be a refinement rather than a rescue.
Keep reading

How to Travel on a Budget Without Missing Out
Budget travel tips that help you spend less on transport, accommodation, and food while still having memorable experiences.
How to Read a Trail Map: Navigation Basics for Hikers
Learn how to read a topographic trail map, understand contour lines, and use a compass for basic backcountry navigation.
The Best Tents for Wild Camping in 2026: 8 Shelters Tested in Real Weather
Compare the best wild camping tents of 2026 on weight, weather resistance and pack size. Real picks for solo trekkers, pairs and shoulder-season trips.
